Posts

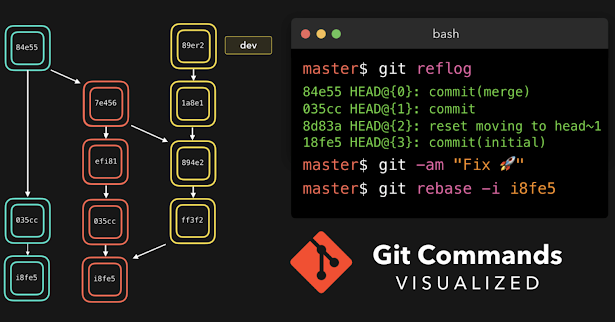
Git best practices for commit message

Image
Certainly! Writing a good commit message is essential for maintaining a clean and understandable version history. The Anatomy of a Good Commit Message Short, Descriptive Title (50 characters or less) A more detailed explanation of the changes in the commit. This can span multiple lines and should provide context and background information as needed. - Bullet points can be used to list specific changes or features added or removed. - Be concise but informative. - Mention relevant issues or references if applicable. Fixes # Here are some guidelines for creating effective commit messages: Short Title: Keep the title concise and to the point. It should be under 50 characters and summarize the essence of the commit. Detailed Explanation: In the body of the message, provide a more detailed explanation of what the commit does, why it's necessary, and any background information that might be helpful. Use multiple lines if needed. Bullet Points: You can use bullet points to list specif
Mastering MySQL Timestamps

Image
Timestamps in MySQL are used to represent date and time values, and they can store information with various levels of precision. MySQL provides several data types for working with timestamps, including DATE, TIME, DATETIME, TIMESTAMP, and YEAR. Let's focus on the two most commonly used timestamp data types in MySQL : DATETIME and TIMESTAMP . These types store both date and time information, but they have some differences in behavior. 1. DATETIME: The DATETIME data type stores date and time values in the format 'YYYY-MM-DD HH:MM:SS'. It does not automatically convert stored values to the server's time zone. The values are stored as provided. You can specify a time zone when inserting data into a DATETIME column, but the time zone information is not used for calculations. Example: '2023-09-03 14:30:00' 2. TIMESTAMP: The TIMESTAMP data type also stores date and time values in the format 'YYYY-MM-DD HH:MM:SS'. Unlike DATETIME, TIMESTAMP values

Formatting MySQL Dates

Image
MySQL's DATE_FORMAT() function provides a wide range of format codes that you can use to represent date and time values in various formats.  It allows you to format a date or datetime value as a string using custom formatting. DATE_FORMAT(date, format) date: The date or datetime value you want to format. format: A string specifying the desired format for the output. This string can include special format codes that represent various components of the date and time (e.g., %Y for the year, %m for the month, %d for the day, %H for the hour, %i for the minute, %s for the second, etc.). SELECT DATE_FORMAT('2023-09-03', '%M %d, %Y'); // returns 'September 03, 2023'. Here is a list of commonly used format codes along with examples: %Y: Four-digit year (e.g., '2023'). %y: Two-digit year (e.g., '23' for 2023). %m: Month (01-12). %c: Month (1-12). %d: Day of the month (01-31). %e: Day of the month (1-31). %H: Hour (00-23). %h: Hour (01-12). %I: Hou

Mastering the for...of Loop in JavaScript

Image
  Contents       1.      Introduction 2.      Syntax 3.      Iterating arrays 4.      Iterating strings 5.      Iterating map and sets 6.      Custom iterables 7.      Conclusion 1. Introduction The for...of loop in JavaScript is a powerful tool for iterating over elements in iterable data structures such as arrays, strings, maps, sets, and more. It provides a cleaner and more concise syntax compared to traditional for loops. Here's how it works: 2. Syntax for (const element of iterable) { // Code to be executed for each element } element: This variable represents the current element in the iteration. You can name it whatever you like. iterable: This is the data structure you want to iterate over. 3. Iterating arrays const numbers = [1, 2, 3, 4, 5]; for (const num of numbers) { console.log(num); } 4. Iterating strings const text = "Hello"; for (const char of text) { console.log(char); } 5. Iterating map and sets const myMap = new Map([ ["key1", &qu

Host Your Node.js App on AWS EC2 Instance for Free in 2024

Image
Contents Introduction Prerequisites Launch an EC2 Instance Prepare the EC2 Instance Connect to the EC2 Instance Install Dependencies and Start Your App in instance terminal Access Your App Run your server in auto mode using pm2 Conclusion 1. Introduction Are you a developer looking to host your Node.js app on a reliable and scalable platform? Amazon Web Services (AWS) offers a variety of services to meet your hosting needs, including EC2 instances. In this tutorial, we will guide you through the process of hosting your Node.js app on an AWS EC2 instance for free using the AWS Free Tier. 2. Prerequisites Before we begin, make sure you have the following prerequisites in place: An AWS account. If you don't have one, sign up for free at https://aws.amazon.com/. Basic knowledge of Node.js.  3. Launch an EC2 Instance 1.      Log in to the AWS Management Console. 2.      Navigate to the EC2 service. 3.      Click on "Launch Instance" to start the instance creation process . 4.

GitCommandsPro Your Guide to Essential Git Commands in 2024

Image
Table of Content 1 Check git version 2 Configuration Settings 3 Initializing a repository 4 Staging files 5 Viewing the status 6 Committing the staged files 7 Skipping the staging area 8. Removing files 9 Renaming or moving files 10 Viewing the staged/unstaged changes 11 Viewing the history 12 Viewing a commit 13 Unstaging files (undoing git add) 14 Discarding local changes 15 Restoring an earlier version of a file      1.     Check git version git --version 2.     Configuration Settings Levels of defining this settings are System level -  apply to All Users of computer. Global – all repositories of the current user. Local – the current repository. Or a repository in the current folder.           Name  git config --global user.name "YOUR_NAME"          Email git config --global user.email YOUR_MAIL@gmail.com          Default Editor (for setting vscode) git config --global core.editor "code --wait"           To edit all the global settings (will open the d