Host Your Node.js App on AWS EC2 Instance for Free in 2024
Contents

- Introduction
- Prerequisites
- Launch an EC2 Instance
- Prepare the EC2 Instance
- Connect to the EC2 Instance
- Install Dependencies and Start Your App in instance terminal
- Access Your App
- Run your server in auto mode using pm2
- Conclusion
1. Introduction
Are you a developer looking to host your Node.js app on a reliable and scalable platform? Amazon Web Services (AWS) offers a variety of services to meet your hosting needs, including EC2 instances. In this tutorial, we will guide you through the process of hosting your Node.js app on an AWS EC2 instance for free using the AWS Free Tier.
2. Prerequisites
Before we begin, make sure you have the following prerequisites in place:
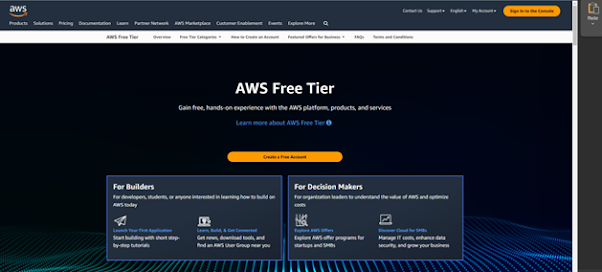
- An AWS account. If you don't have one, sign up for free at https://aws.amazon.com/.
- Basic knowledge of Node.js.

3. Launch an EC2 Instance
1. Log in to the AWS Management Console.2. Navigate to the EC2 service.3. Click on "Launch Instance" to start the instance creation process.

4. Choose an Amazon Machine Image (AMI) that complies with your needs. Go with default if you have no idea what AMI is.

5. Select an instance type that falls within the Free Tier, such as t2.micro or t3.micro.6. To connect to the instance via SSH, create a key pair, or choose one that already exists. This will allow you to transfer files from your local workstation to your AWS instance using the private key stored in the pem file you created earlier. In this tutorial, we'll go over the file-transfer procedure.


7. Configure the instance details, including the number of instances, network settings, and storage options.

8. Set up security groups to allow inbound traffic on the desired ports for your Node.js app.9. Review the instance details and click "Launch”

4. Prepare the EC2 Instance
Connect with instance terminal


Now Update the package manager on the EC2 instance by running the following command:sudo yum update -yInstall Node.js using a package manager like yum or nvm.sudo yum install nodejs -y5. Connect to the EC2 Instance
1. Obtain public IP address of created instance from the EC2 dashboard.
2. To connect to the instance use WinSCP software get it at https://winscp.net/eng/download.php
WinSCP (Windows Secure Copy) is a popular open-source SFTP (SSH File Transfer Protocol), FTP (File Transfer Protocol), and SCP (Secure Copy) client for Windows. It allows secure file transfer between a local Windows machine and a remote server or computer using SSH (Secure Shell) protocols.
Open WinSCP and click “New Tab”
Now Click “Advanced” to add private key PEM file 
You will see a screen similar to the one below after logging in; on the right side is the folder structure of your AWS instance, and on the left is that of your system. You may now drag and drop files from your system to the AWS instance and vice versa.

6. Install Dependencies and Start Your App in instance terminal
1. Navigate to the directory where you uploaded your app files.2. Install the app dependencies by running npm install.3. Start your Node.js app using the appropriate command (npm start, node app.js, etc.).
7. Access Your App
1. If you haven't yet configured custom tcp, do so. Configure a specific TCP port for your program in your instance.

2. Find the public IP address of your EC2 instance in the AWS EC2 dashboard.3. Open a web browser and enter the IP address followed by the port your app is listening on (e.g., http://public-ip-address:3000).
8. Run your server in auto mode using pm2
PM2 (Process Manager 2) is a production-ready process manager for Node.js applications. It is designed to manage and monitor Node.js processes in a production environment, providing features that enhance reliability, performance, and ease of management.
Install pm2 in instance terminalsudo npm install pm2@latest -g
1. Log in to the AWS Management Console.
2. Navigate to the EC2 service.
3. Click on "Launch Instance" to start the instance creation process.

4. Choose an Amazon Machine Image (AMI) that complies with your needs. Go with default if you have no idea what AMI is.

5. Select an instance type that falls within the Free Tier, such as t2.micro or t3.micro.
6. To connect to the instance via SSH, create a key pair, or choose one that already exists. This will allow you to transfer files from your local workstation to your AWS instance using the private key stored in the pem file you created earlier. In this tutorial, we'll go over the file-transfer procedure.


7. Configure the instance details, including the number of instances, network settings, and storage options.

9. Review the instance details and click "Launch”

Connect with instance terminal


Now Update the package manager on the EC2 instance by running the following command:
sudo yum update -yInstall Node.js using a package manager like yum or nvm.
sudo yum install nodejs -y5. Connect to the EC2 Instance
1. Obtain public IP address of created instance from the EC2 dashboard.

2. To connect to the instance use WinSCP software get it at https://winscp.net/eng/download.php
WinSCP (Windows Secure Copy) is a popular open-source SFTP (SSH File Transfer Protocol), FTP (File Transfer Protocol), and SCP (Secure Copy) client for Windows. It allows secure file transfer between a local Windows machine and a remote server or computer using SSH (Secure Shell) protocols.
Open WinSCP and click “New Tab”

Now Click “Advanced” to add private key PEM file

You will see a screen similar to the one below after logging in; on the right side is the folder structure of your AWS instance, and on the left is that of your system. You may now drag and drop files from your system to the AWS instance and vice versa.

6. Install Dependencies and Start Your App in instance terminal
1. Navigate to the directory where you uploaded your app files.
2. Install the app dependencies by running npm install.
3. Start your Node.js app using the appropriate command (npm start, node app.js, etc.).
7. Access Your App
1. If you haven't yet configured custom tcp, do so. Configure a specific TCP port for your program in your instance.

2. Find the public IP address of your EC2 instance in the AWS EC2 dashboard.
3. Open a web browser and enter the IP address followed by the port your app is listening on (e.g., http://public-ip-address:3000).
8. Run your server in auto mode using pm2
PM2 (Process Manager 2) is a production-ready process manager for Node.js applications. It is designed to manage and monitor Node.js processes in a production environment, providing features that enhance reliability, performance, and ease of management.
Install pm2 in instance terminal
sudo npm install pm2@latest -gRun your server
pm2 start serverMainFile.js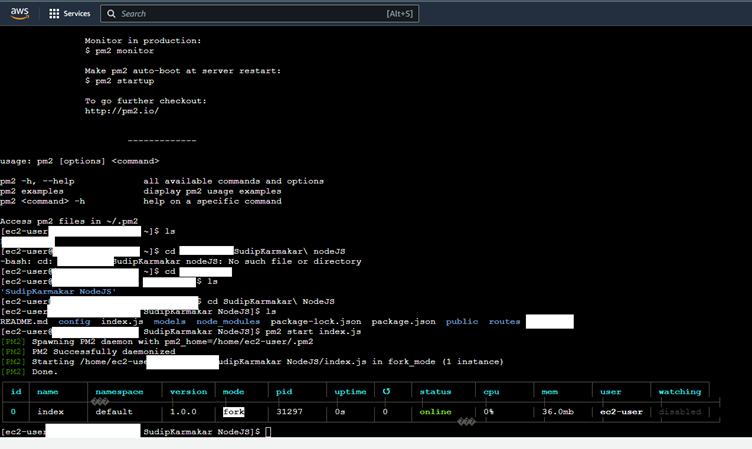
9. Conclusion
Congratulations! You have successfully hosted your Node.js app on an AWS EC2 instance using the AWS Free Tier. Remember to closely monitor your resource usage and be aware of the Free Tier limits to avoid unexpected charges. AWS EC2 provides a scalable and reliable hosting environment for your Node.js applications, enabling you to focus on building and deploying your projects hassle-free.

Comments
Post a Comment